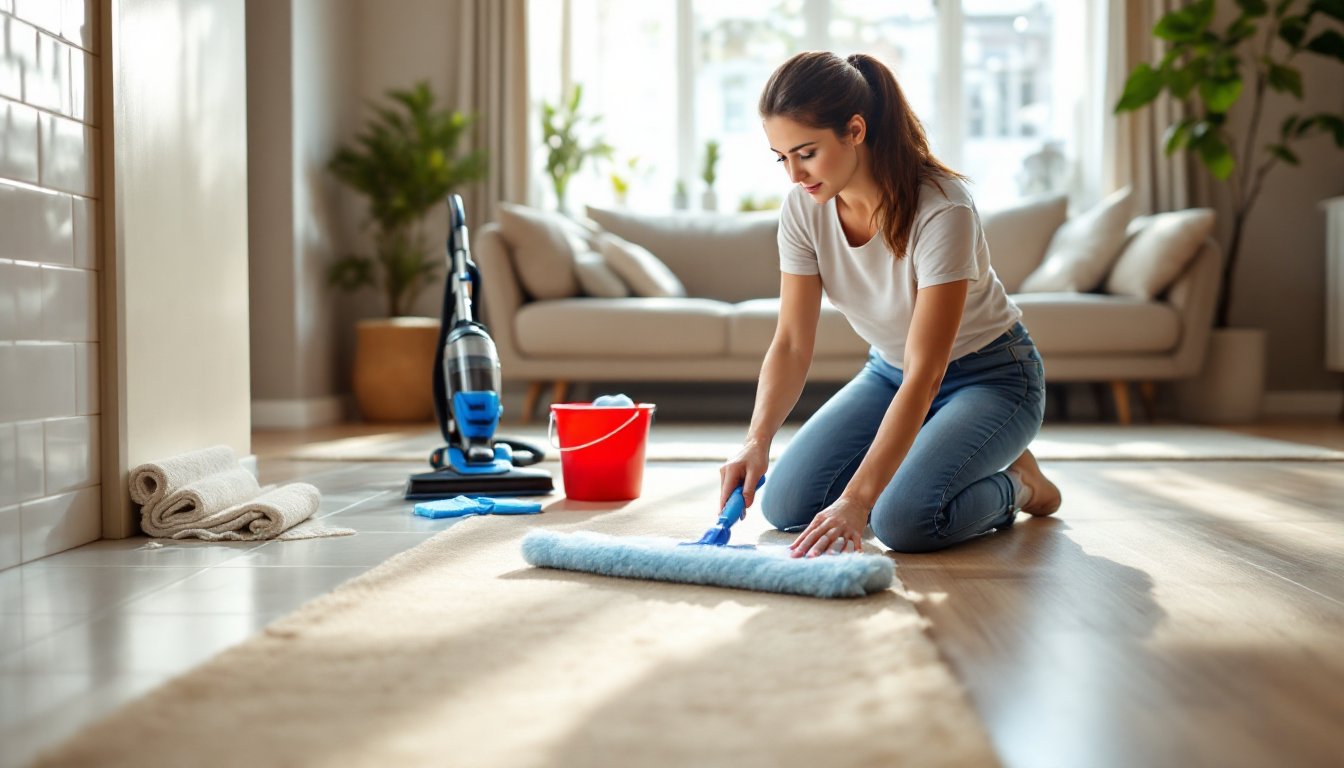
Floors take a beating. From tracked-in dirt and spilled coffee to pet dander and dust mites, everyday life creates a layer of grime that regular sweeping or vacuuming just can’t touch. Deep cleaning floors isn’t about aesthetics alone, it extends the life of flooring materials, improves indoor air quality, and makes a home healthier. But there’s no one-size-fits-all approach. Hardwood needs different treatment than tile, and carpet requires its own arsenal of techniques. This guide walks through the right methods for each flooring type, the tools that actually work, and how to avoid the common mistakes that lead to dull finishes or premature wear.
Table of Contents
ToggleKey Takeaways
- Deep cleaning floors extends their lifespan, improves indoor air quality, and removes embedded dirt that regular vacuuming cannot reach.
- Use pH-neutral cleaners and minimal moisture for hardwood, alkaline cleaners with grout brushes for tile, and hot water extraction for carpet—each floor type requires different deep cleaning methods.
- Essential tools for deep cleaning floors include microfiber mops, two-bucket systems, soft-bristle brushes, and floor-specific cleaners to prevent damage and achieve professional results.
- Most floors need deep cleaning only 1–2 times per year; consistent daily maintenance with doormats, sweeping, and prompt stain treatment reduces the need for intensive cleaning.
- Avoid steam mops on hardwood, wire brushes on tile, and excessive soap in carpet extractors—these common mistakes cause permanent damage and premature wear.
Why Deep Cleaning Your Floors Makes a Real Difference
Surface cleaning, sweeping, dust mopping, quick vacuuming, removes visible debris, but it doesn’t touch the buildup in grout lines, the grit embedded in carpet fibers, or the film on hardwood from cleaners and foot traffic. Over time, that accumulation dulls finishes, scratches surfaces, and creates an environment where allergens and bacteria thrive.
Deep cleaning restores floors to near-original condition. It lifts embedded dirt, removes soap residue, and strips away layers of buildup that regular cleaning leaves behind. For hardwood, it prevents scratches from abrasive particles. For tile, it keeps grout from becoming permanently stained. For carpet, it eliminates odors and allergens that vacuuming alone can’t reach.
There’s also a practical side: floors that are properly maintained last longer. Replacing hardwood or tile is expensive and disruptive. Deep cleaning twice a year, more in high-traffic areas, protects that investment and delays costly repairs or replacements.
Safety matters, too. Residue from improper cleaning can make floors slippery, especially tile and vinyl. Deep cleaning removes buildup and resets the surface, reducing slip hazards.
Essential Tools and Supplies for Deep Cleaning Every Floor Type
Having the right tools prevents damage and saves time. Here’s what belongs in a deep-cleaning kit:
General Tools:
- Microfiber mops and cloths: These trap dirt instead of spreading it. Avoid sponge mops, they push dirty water into grout lines and cracks.
- Buckets (two): One for clean solution, one for rinse water. This prevents re-depositing grime.
- Soft-bristle scrub brush: For grout and textured surfaces. Stiff brushes scratch hardwood and some tile glazes.
- Wet/dry vacuum: Speeds up water extraction on tile and carpet. A standard shop vac works fine.
- Spray bottles: For targeted application of cleaners.
Floor-Specific Supplies:
- Hardwood: pH-neutral hardwood cleaner (not all-purpose cleaners, which leave residue), terry cloth pads, and a hardwood-specific mop. Skip vinegar, it’s acidic and dulls polyurethane over time.
- Tile and grout: Alkaline tile cleaner, grout brush (narrow with stiff nylon bristles), and a steam cleaner if dealing with stubborn stains. Acidic cleaners work on mineral deposits but shouldn’t be used on natural stone.
- Carpet: Carpet extractor (rentable at hardware stores), enzymatic cleaner for pet stains, and carpet rake to lift fibers after drying.
PPE:
- Rubber gloves for handling cleaners.
- Knee pads if scrubbing grout by hand.
- Goggles if using acidic or alkaline cleaners.
Tool alternatives: A string mop can substitute for a microfiber mop if wrung nearly dry. A stiff-bristled toothbrush works for grout in tight spots. A standard vacuum with an upholstery attachment can handle light carpet cleaning if an extractor isn’t available.
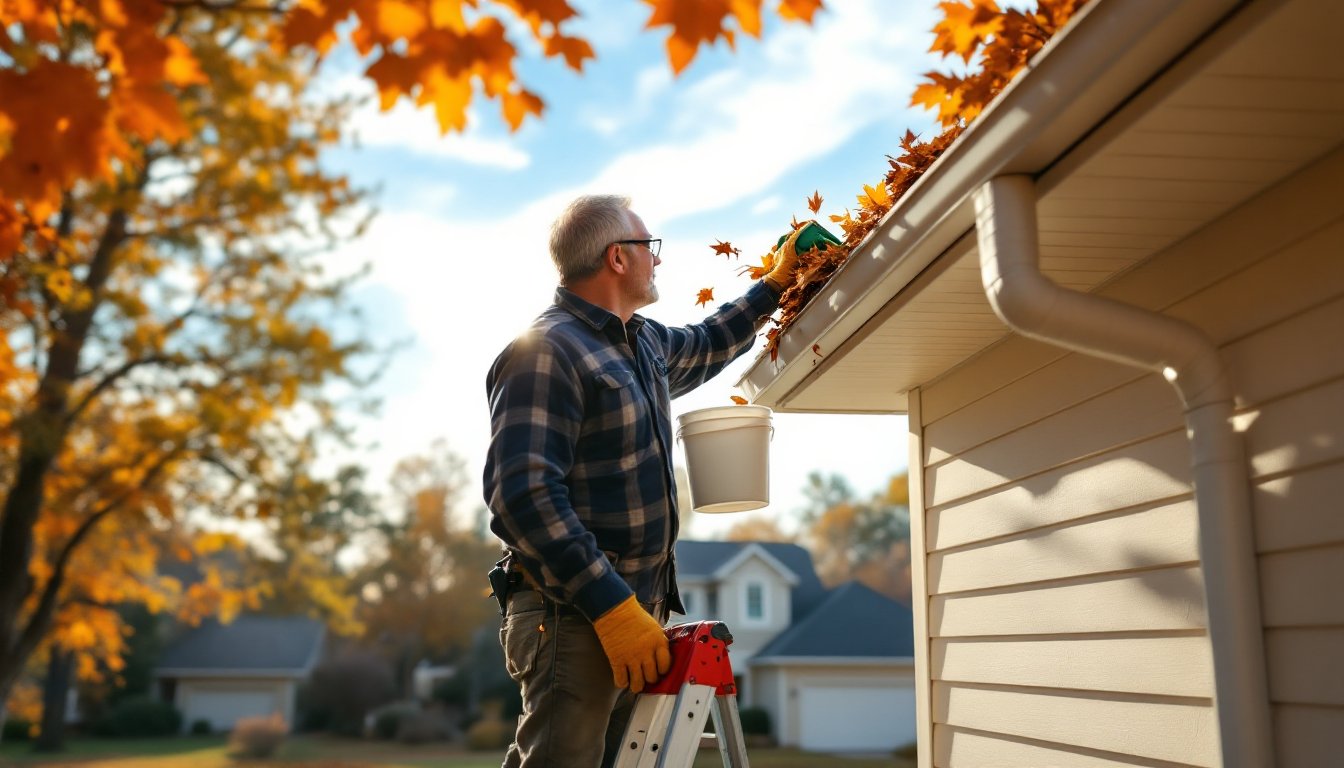
How to Deep Clean Hardwood Floors Without Causing Damage
Hardwood is durable, but it’s vulnerable to moisture and abrasives. Too much water causes warping: harsh cleaners strip finishes. Here’s the process:
Prep Work:
- Remove all furniture and rugs. Dirt hides under furniture legs and rug edges.
- Sweep or vacuum thoroughly. Use a soft-bristle attachment, beater bars on vacuums can scratch. Get into corners and along baseboards.
- Check the finish. Sprinkle a few drops of water on the floor. If it beads up, the finish is intact. If it soaks in, the floor needs refinishing, not deep cleaning.
Cleaning Steps:
- Mix cleaner according to product instructions. Use a pH-neutral hardwood cleaner, products like Bona or similar are formulated to avoid residue. Never use dish soap, vinegar, or ammonia-based cleaners.
- Dampen, don’t soak, a microfiber mop. Wring it out until it’s barely wet. Excess water seeps into seams and causes swelling.
- Mop in the direction of the wood grain. Work in 4×4-foot sections. Rinse and wring the mop frequently.
- Dry immediately with a clean terry cloth. Don’t let water sit.
Stubborn Spots:
For scuff marks, rub gently with a microfiber cloth and a dab of cleaner. For sticky residue, use a plastic scraper, metal scratches. If dealing with worn or delicate floors, techniques used for cleaning marble floors can offer insights into low-moisture methods.
What Not to Do:
- Don’t use steam mops. The heat and moisture damage finishes and can delaminate engineered wood.
- Don’t use oil soaps or wax-based cleaners unless the floor is unfinished or waxed (rare in modern homes).
- Don’t skip drying. Standing water is hardwood’s enemy.
The Best Method for Deep Cleaning Tile and Grout
Tile itself is easy, grout is the problem. Porous and textured, grout absorbs spills and traps dirt. Deep cleaning tile means focusing on those grout lines.
Prep Work:
- Sweep or vacuum the entire floor. Loose dirt turns into mud once water hits it.
- Test your cleaner on an inconspicuous spot. Acidic cleaners can etch natural stone tile (marble, travertine, slate). Alkaline cleaners are safer for most tile types.
Cleaning Steps:
- Apply alkaline tile cleaner to the floor. Spray or mop it on, covering tile and grout. Let it sit for 5–10 minutes to break down grime.
- Scrub grout lines with a grout brush. Use firm, back-and-forth strokes. This takes time, grout doesn’t release dirt easily. For large areas, a floor brush with a handle saves knees.
- Mop up dirty water with a microfiber mop or wet/dry vacuum. Change water frequently.
- Rinse with clean water. Residue attracts dirt, so this step isn’t optional.
- Dry the floor or let it air-dry.
For Stubborn Grout Stains:
- Steam cleaner: High-temperature steam lifts stains without chemicals. It’s effective but requires a dedicated machine.
- Oxygen bleach paste: Mix powdered oxygen bleach (not chlorine bleach) with water to form a paste. Apply to grout, let sit for 15 minutes, scrub, and rinse. Chlorine bleach weakens grout over time.
- Hydrogen peroxide and baking soda: A DIY alternative. Mix to form a paste, apply, scrub after 10 minutes.
When to Seal Grout:
Once clean and dry, apply a penetrating grout sealer. This fills pores and resists staining. Reapply every 1–2 years in kitchens and bathrooms. Techniques shared by mopping experts emphasize consistent tool maintenance for streak-free results.
What Not to Do:
- Don’t use vinegar on natural stone or cement-based grout. It’s acidic and causes deterioration.
- Don’t use a wire brush. It scratches tile and shreds grout.
Deep Cleaning Carpets and Rugs: DIY Techniques That Work
Vacuuming removes surface dirt, but deep cleaning extracts oils, allergens, and odors embedded in carpet fibers. For homeowners dealing with heavy traffic or pets, a thorough approach is necessary.
Prep Work:
- Vacuum thoroughly. Go over high-traffic areas twice. Use a crevice tool along baseboards.
- Treat stains first. Apply an enzymatic cleaner to pet stains, following product instructions. For oil-based stains, blot with a small amount of dish soap and water. Don’t rub, it spreads the stain and damages fibers.
- Move furniture or use foil squares under legs to prevent rust stains on damp carpet.
Hot Water Extraction (Steam Cleaning):
This is the most effective DIY method. Rent a carpet extractor from a hardware store (often called a steam cleaner, though it uses hot water, not steam).
- Fill the machine with hot water and carpet cleaning solution. Follow manufacturer dilution ratios, too much soap leaves residue that attracts dirt.
- Work in overlapping passes. Push the machine forward while dispensing solution, pull back slowly while extracting. The extraction pass is where the cleaning happens.
- Make 2–3 passes over high-traffic areas. Don’t over-wet, excess moisture can soak the carpet pad and cause mildew.
- Empty and refill the machine as needed. Dirty water clogs the system and reduces suction.
- Run a rinse-only pass if possible. Fill the tank with clean water (no soap) and extract again. This removes detergent residue.
Drying:
Open windows, run fans, and keep foot traffic off the carpet for 6–12 hours. Damp carpet is a mold risk. In humid climates, use a dehumidifier. Insights from interior cleaning strategies often emphasize ventilation during moisture-intensive tasks.
Alternative Methods:
- Dry carpet cleaner (powder): Sprinkle on, work in with a brush, vacuum after 30 minutes. Less effective than extraction but dries immediately.
- DIY spot cleaning: Mix 1 tablespoon clear dish soap, 1 tablespoon white vinegar, and 2 cups warm water. Blot (don’t scrub) onto stains with a clean cloth.
What Not to Do:
- Don’t use laundry detergent or all-purpose cleaners in an extractor. They foam excessively and leave residue.
- Don’t skip the extraction pass, just wetting the carpet makes the problem worse.
Maintaining Your Floors Between Deep Cleans
Deep cleaning isn’t a weekly task. With consistent maintenance, most floors only need it 1–2 times per year (more in high-traffic homes or if there are pets).
Daily/Weekly Tasks:
- Hardwood: Sweep or dust mop daily in high-traffic areas. Use doormats to trap grit. Felt pads under furniture legs prevent scratches.
- Tile: Sweep or vacuum daily. Spot-mop spills immediately, grout stains quickly. Weekly damp mopping with a pH-neutral cleaner keeps buildup in check.
- Carpet: Vacuum 1–2 times per week (more for pets). Treat stains as soon as they happen. A carpet rake fluffs fibers and dislodges embedded dirt between vacuuming.
Preventive Measures:
- Doormats inside and out: They capture 80% of tracked-in dirt if they’re at least 3 feet long.
- No-shoes policy: Shoes track in oil, grit, and salt (in winter climates), which damage all floor types.
- Area rugs in high-traffic zones: Protect hardwood and tile in hallways and entryways. Rugs are easier to clean or replace than flooring.
- Furniture pads: Felt pads prevent scratches on hardwood: plastic coasters work for tile.
When to Call a Professional:
If carpet has pet odor that persists after DIY extraction, a professional with truck-mounted equipment and deodorizers may be necessary. For hardwood with deep scratches or finish damage, refinishing is a specialized job. Tile with cracked or crumbling grout may need regrouting, cosmetic cleaning won’t fix structural issues. Homeowners in specific regions might explore options like professional cleaning services for heavy-duty or time-sensitive projects.
Seasonal Deep Clean Schedule:
- Spring and fall: Deep clean all floors.
- After winter: Focus on entryways where salt and slush tracked in.
- After summer: Address high-traffic areas, especially if kids or pets spent more time indoors.
Conclusion
Deep cleaning floors isn’t glamorous, but it’s one of the most impactful maintenance tasks a homeowner can tackle. The right methods and tools prevent damage, extend the life of flooring, and keep spaces healthier. Whether it’s lifting years of grime from grout, restoring hardwood’s luster, or pulling allergens from carpet, the effort pays off in durability and appearance. Skip the guesswork, respect the material, and the results speak for themselves.